Hello – it’s great to see you.
You are probably eager to find out about The Best Swift Performance Settings for WordPress in 2022
Initially, my idea was to create a short guide but after implementing all recommended settings, things got a little bit out of hand.
Swift Performance is one of the new powerhouses between the different caching plugins next to WP Rocket, WP Fastest Cache, WP Super Cache, W3 Total Cache, etc.
I talked about Swift Performance before but in this guide, I am going to discuss the advantages of Swift in-depth and will give you an idea about the right settings for this plugin.
Note
I am aware of the negative reviews that mostly talk about the issues with billing, customer service and even go as far as accusing them of scamming clients. This is definitely not okay and shouldn’t be happening in our day and age.
I have used them for the past 3 years and luckily didn’t have any issues so far. (fingers crossed).
If you purchased Swift Performance and want to get the most out of the Plugin, keep on reading!
The Best Swift Performance Settings for WordPress
Before we start, some background on my experience with SWIFT.
1. My experience
Swift Performance has become my go-to cache plugin in the last 3 years.
I had a longer trial run with the Lite version and after seeing good results on my site speed, I went ahead and purchased the full version.
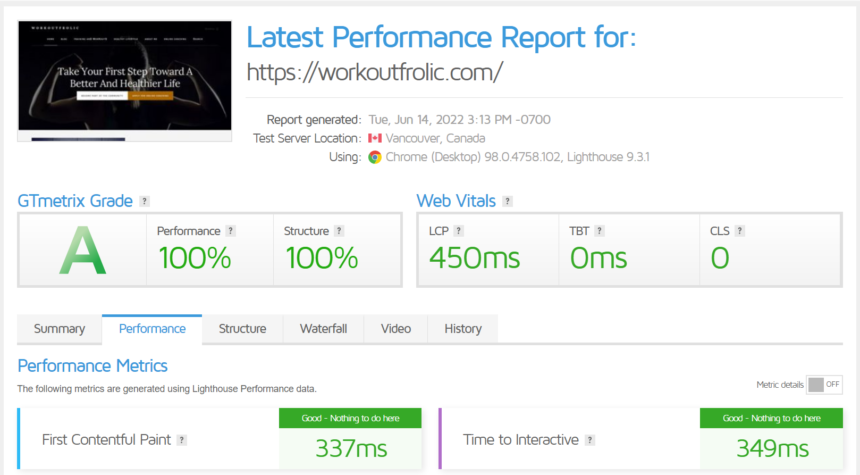
If you are interested to find out how much our website speed improved, here are our scores on GTmetrix, Google Page Speed, and Pingdom after we optimized with Swift Performance and switched to Cloudways hosting.
1.1. GTmetrix
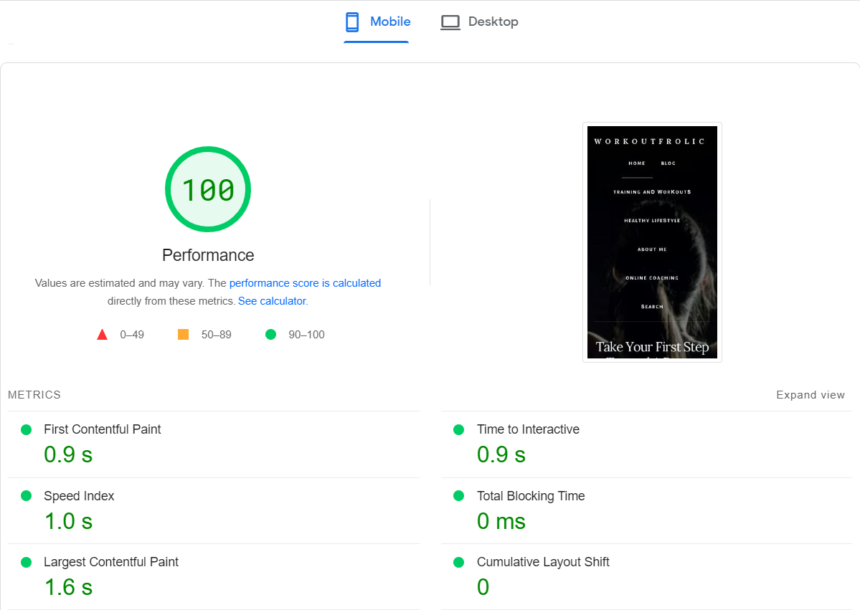
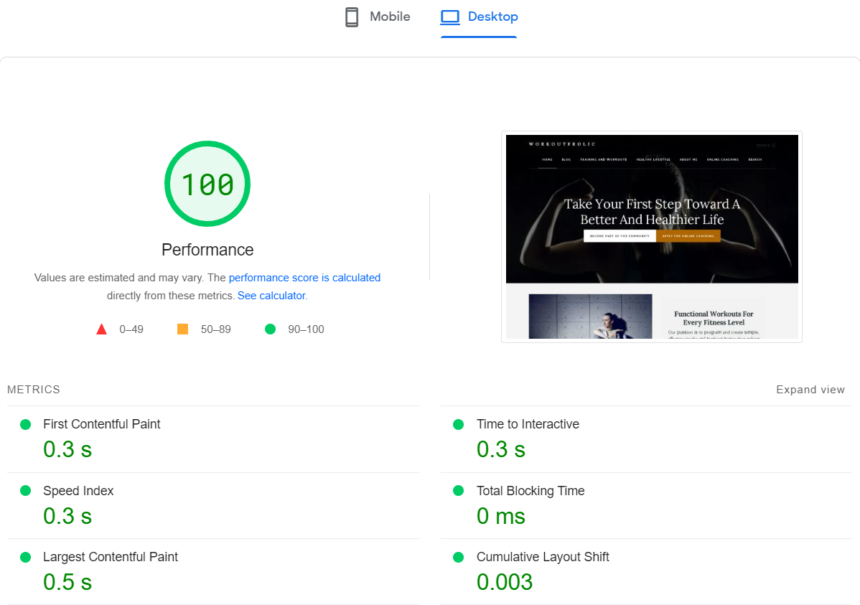
1.2. Google Page Speed: Mobile & Desktop
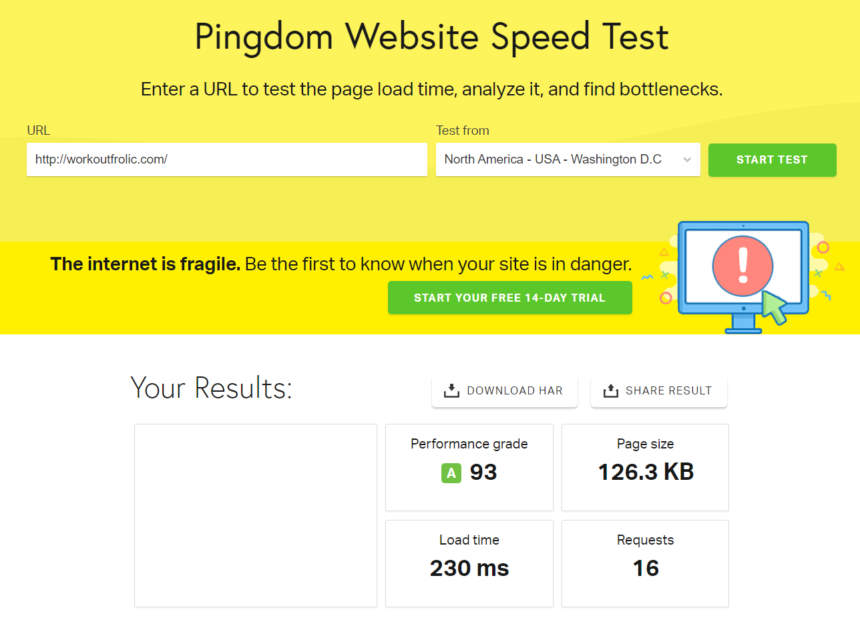
1.3. Pingdom
If you are wondering what the difference between those three-page speed measuring tools is, you should take a break and read my previous guide.
Why did I choose Swift Performance in 2020?
- Besides the fact that Swift Performance in combination with our new hosting provider Cloudways gave me the fastest page speed for the first time, the all-in-one caching tool was exactly what I was looking for.
- Before Swift, it was always a hustle to jump between different “free” plugins of caching & image optimization to achieve nowhere near as good results.
- At the end of the day, you don’t want to spend days trying different combinations of plugins to find minimal improvement for your website.
- Swift Performance to me, is a great all-around plugin that offers you more than just caching: One of the best caching plugins on the market including new features & technologies (Preloading of cache, etc.)
- Unlimited Image Optimizer
- Database Cleanup including scheduling option
- Allows you to host your Fonts locally
- Plugin Organizer
- 14-day money-back guarantee
Affiliate Disclaimer:
If you are interested in purchasing Swift Performance, I would appreciate it, if you would sign up over my provided link which will enable us to create more beginner-friendly tutorials like these.
At what price does Swift Performance come?
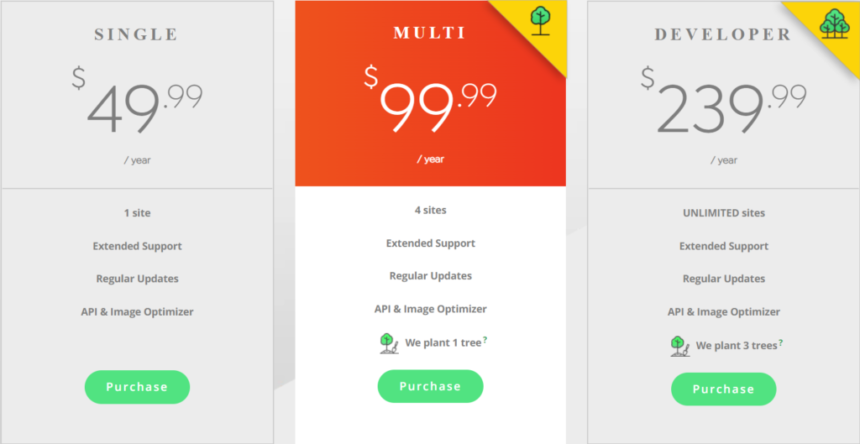
If you are managing one website,
go ahead and use the “single option“.
If you plan on using this plugin for multiple pages,
use the “multi-option“. (we chose this option)
In case you are an advanced developer with a lot of sites,
use the “developer option“.
Besides the page scores & reviews, Swift Performance is a very user-friendly plugin.
If you are completely new to optimization plugins, just use the “Setup Wizard” and with a few clicks it will set you up with the basic settings.
If you are still unsure about the Setup Wizard, I will guide you through it step by step.
2. Setup Wizard
From your dashboard – click on “Setup Wizard” and you get the following screen:
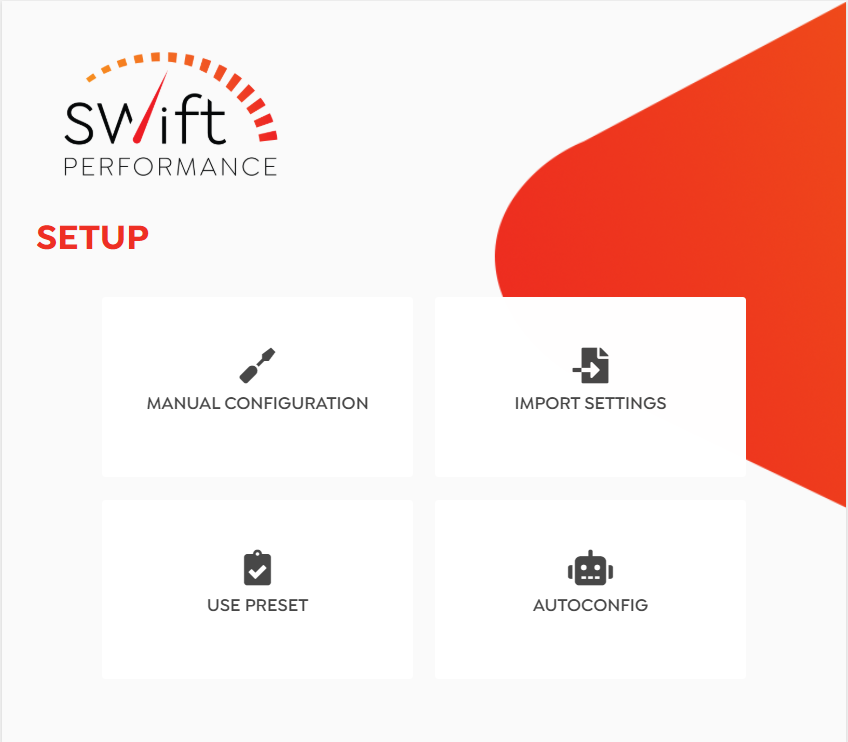
Click on “Autoconfig” and Swift does the work for you.
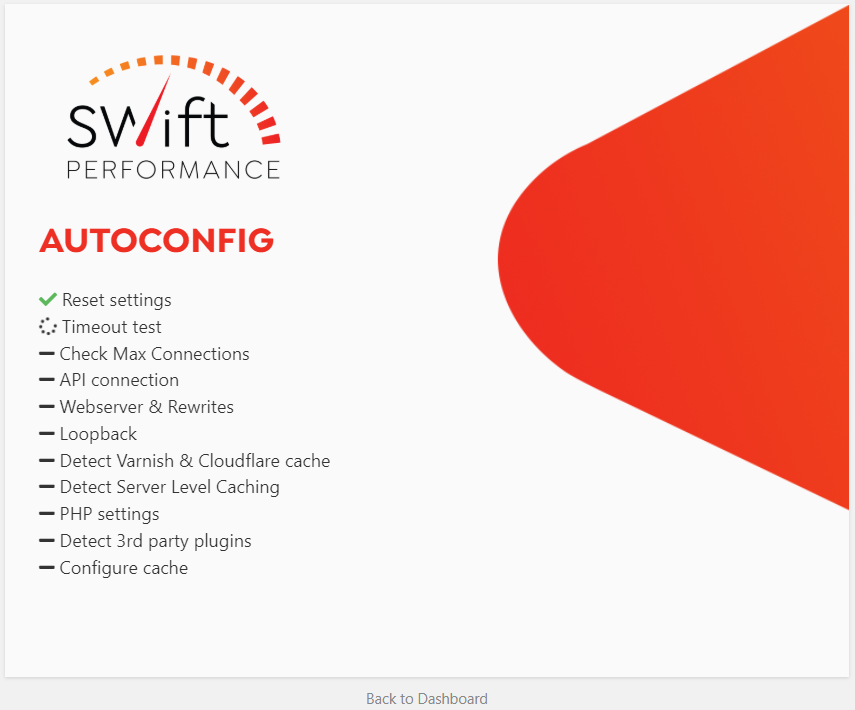
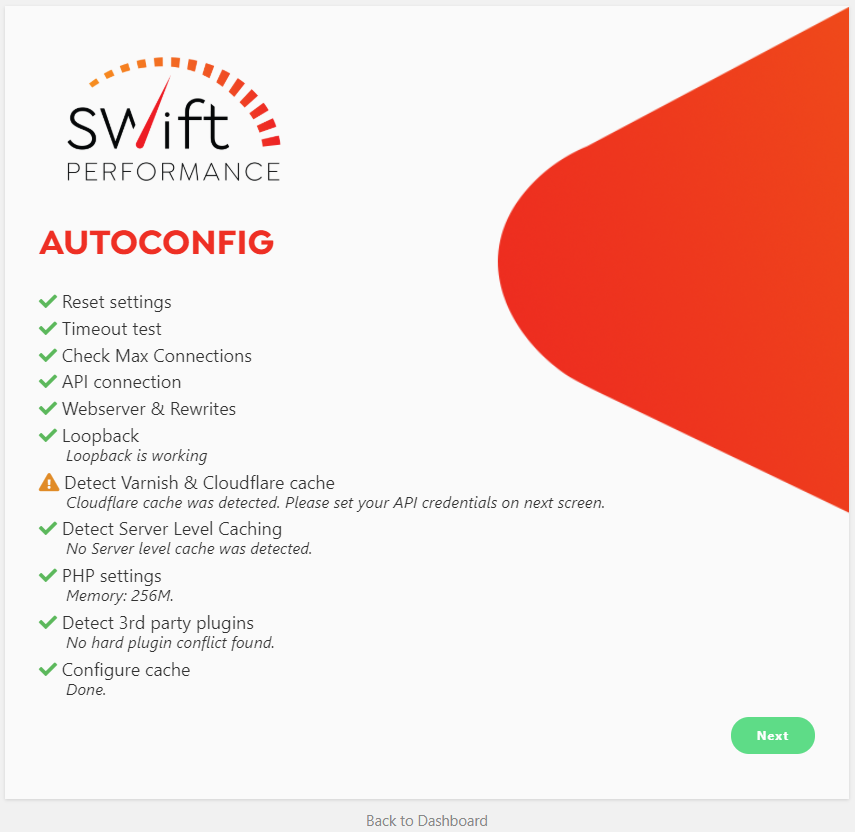
If you are using a Content Delivery Network (CDN) like Cloudflare, fill in the necessary information in the next step.
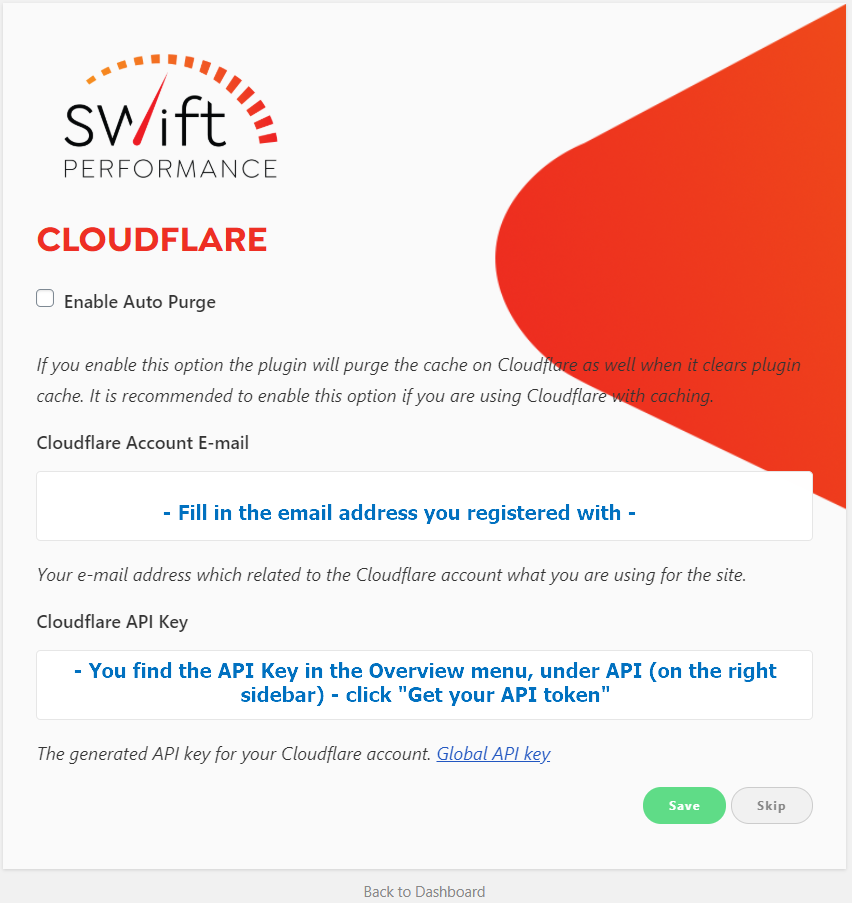
After filling in all the information for Cloudflare (also possible afterward) – the Setup is finished.

The Setup Wizard is done!
If you are not happy with the results that you got so far, let’s deep-dive into the settings of Swift Performance.
Note
You will find the recommended settings first as a summary and in the screenshots which also include a description for choosing specific features.
3. Settings
Your dashboard is separated into different tabs with:
- Settings
- Image Optimizer
- Database Optimizer
- Critical Font
- Plugin Organizer
Let’s start with the Settings tab.
3.1. General
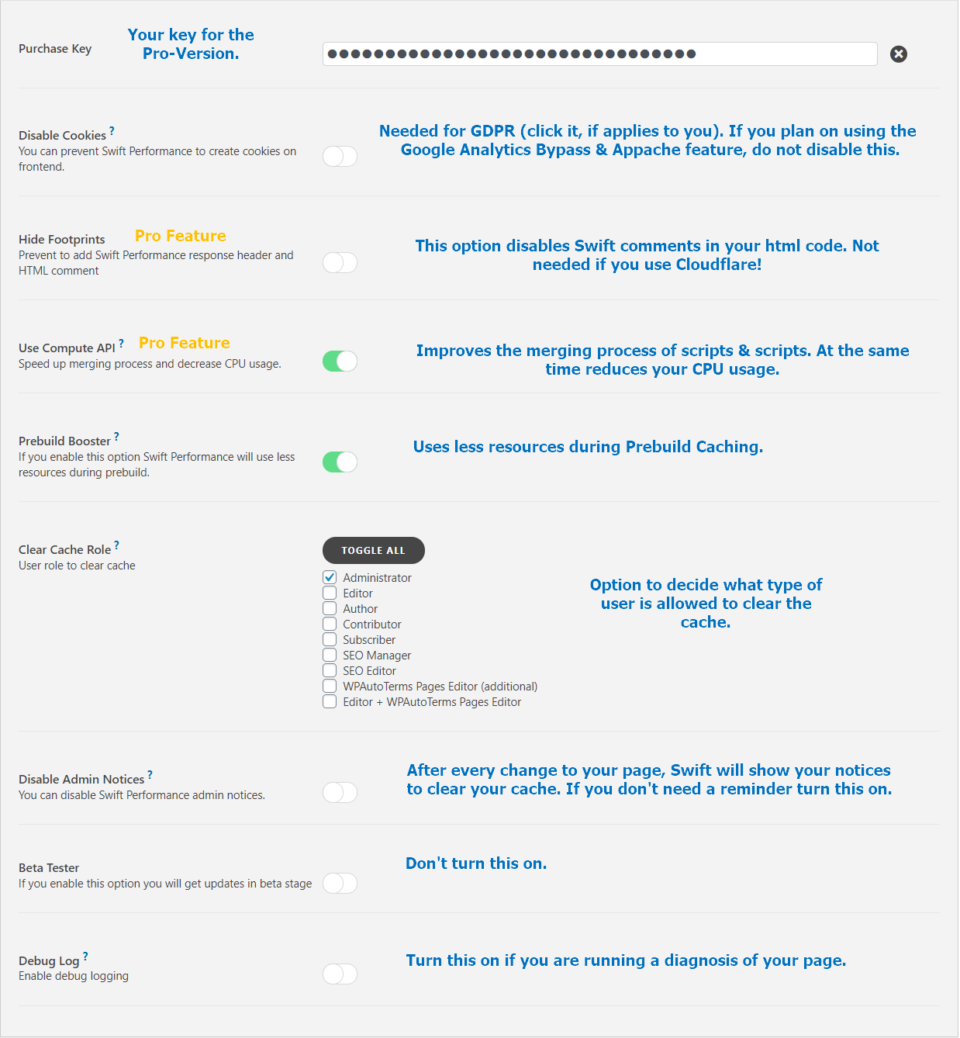
3.1.1. General
- User Computer API – ON
- Prebuild Booster – ON
- Clear Cache Role – Administrator if you are the only user
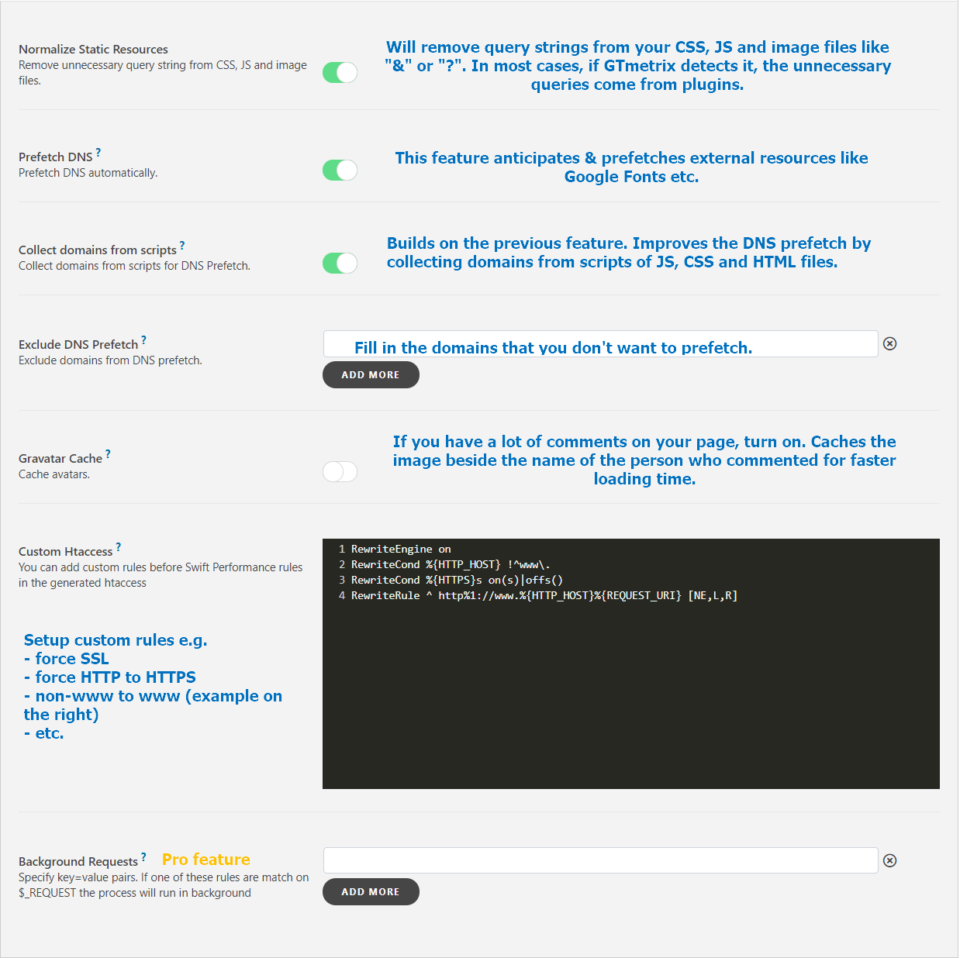
3.1.2. Tweaks
- Normalize Static Resources – ON
- Prefetch DNS – ON
- Collect domains from scripts – ON
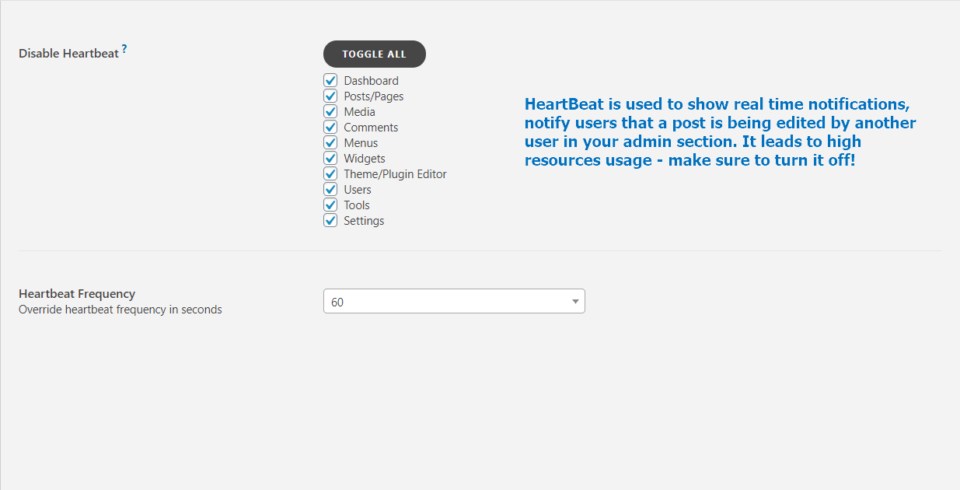
3.1.3. Heartbeat
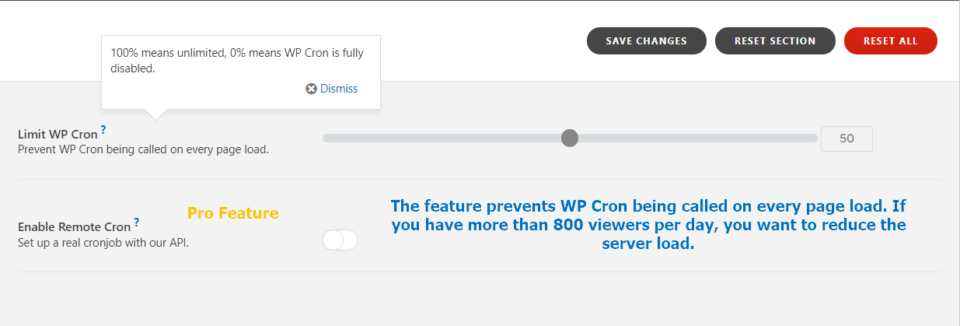
3.1.5. Cronjobs
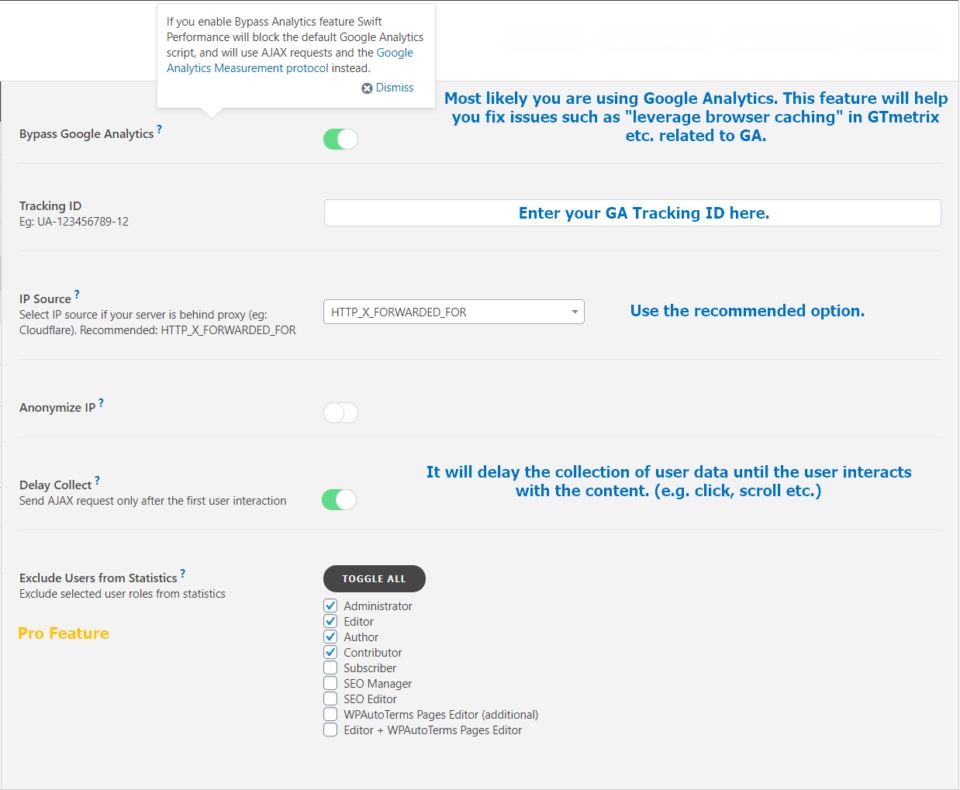
3.1.6. Google Analytics
- Bypass Google Analytics – ON
- IP Source – Use the recommended option
- Delay Collect – ON
3.2. Media
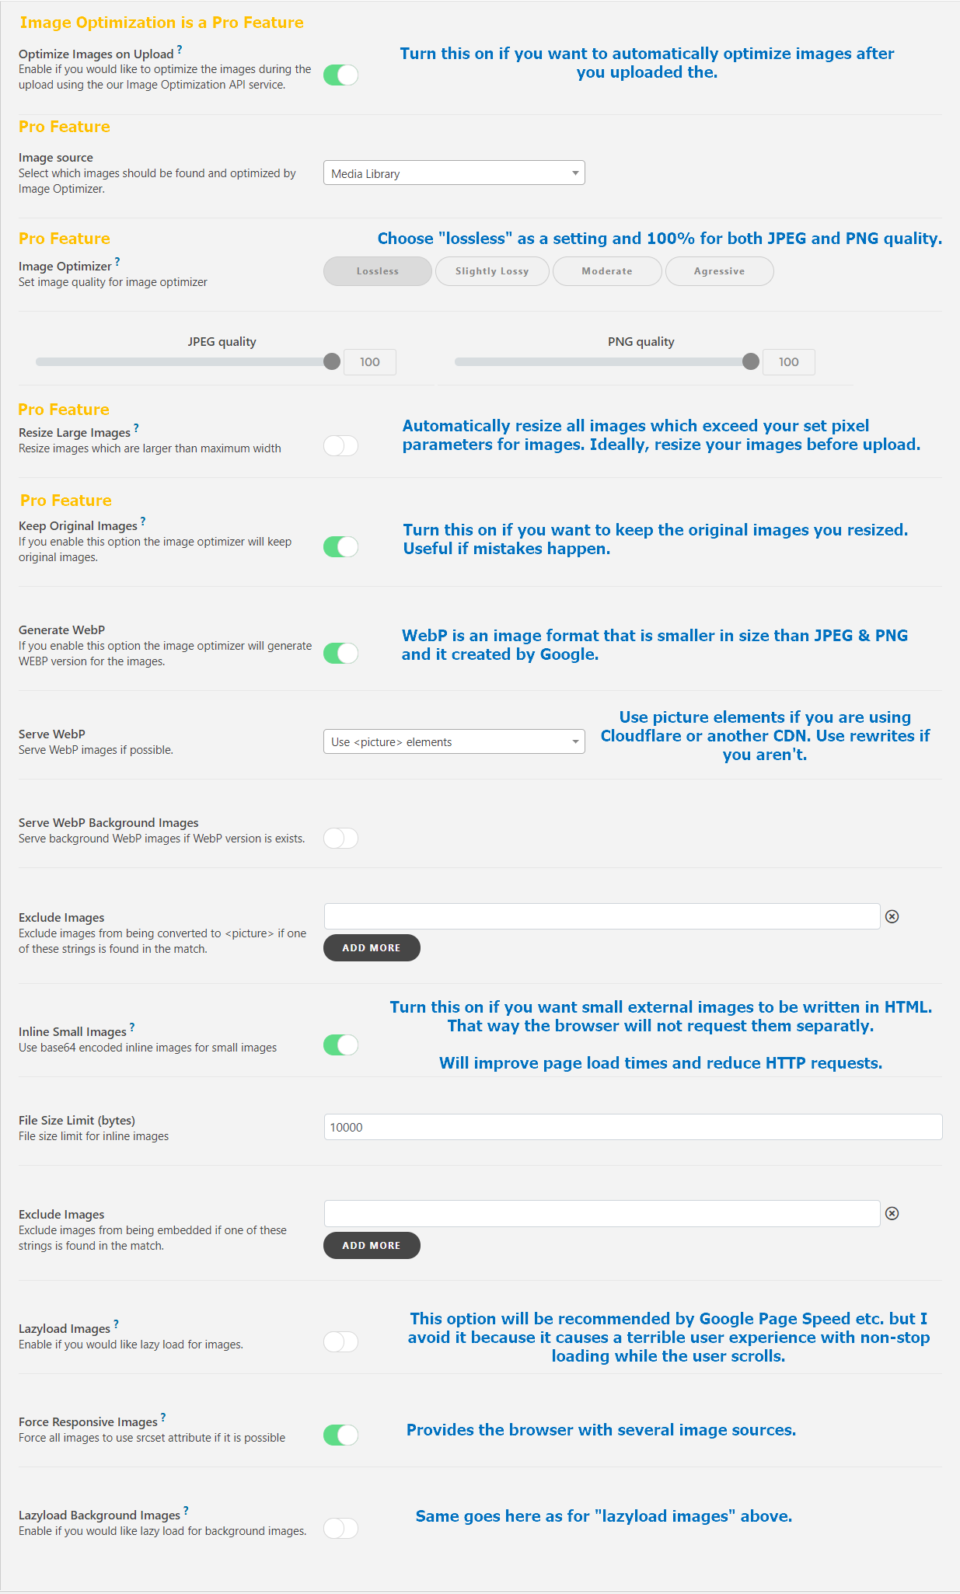
3.2.1. Images
- Optimize Images on Upload – ON
- Image Optimizer – Lossless
- Keep Original Images – ON
- Generate WebP – ON
- Server WebP – Use <picture> elements
- Inline Small Images – ON
- Force Responsive Images – ON
3.2.2. Embeds

3.3. Optimization
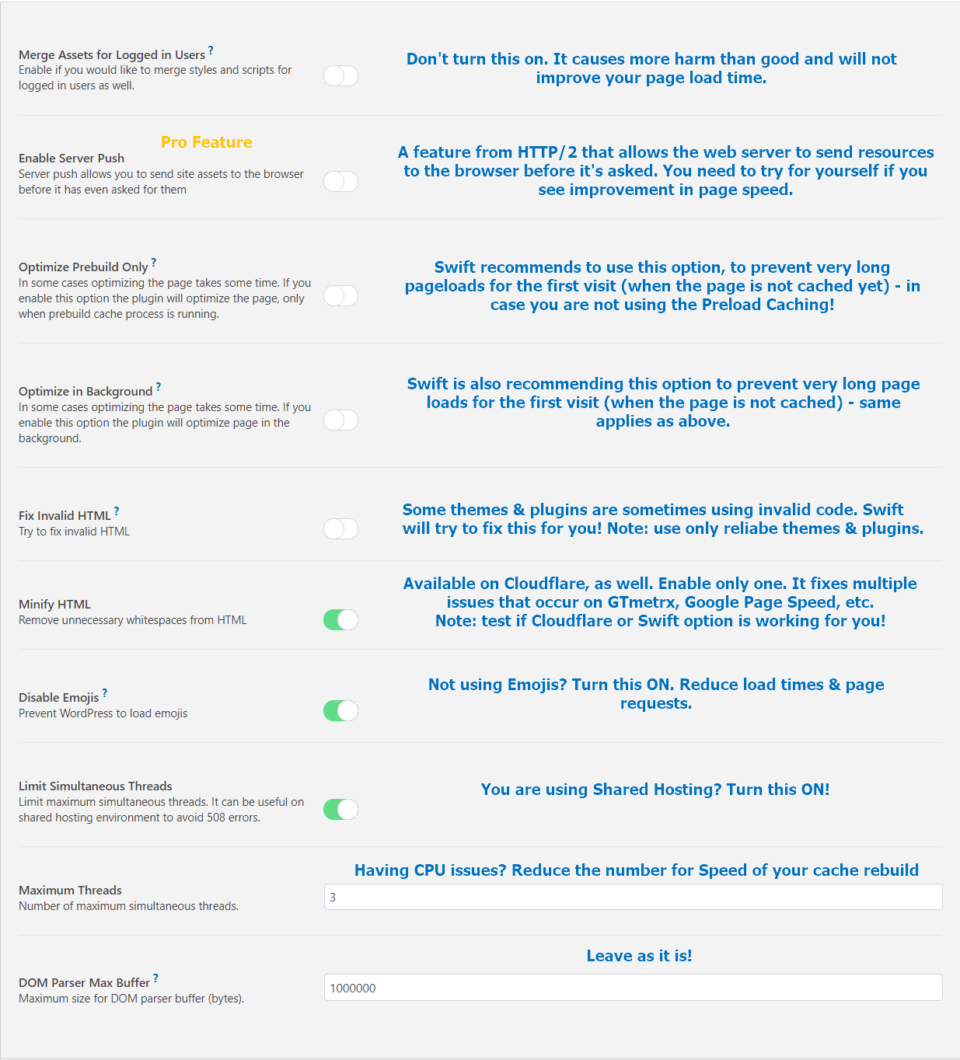
3.3.1. General
- Minify HTML – ON
- Disable Emojis – ON
- Limit Simultaneous Threads – ON
3.3.2. Scripts
- Merge Scripts – ON (read below)
- Async Execute – ON (read below)
- Exclude Script Localizations – ON
- Minify Javascript – ON
- Disable JQuery Migrate – ON

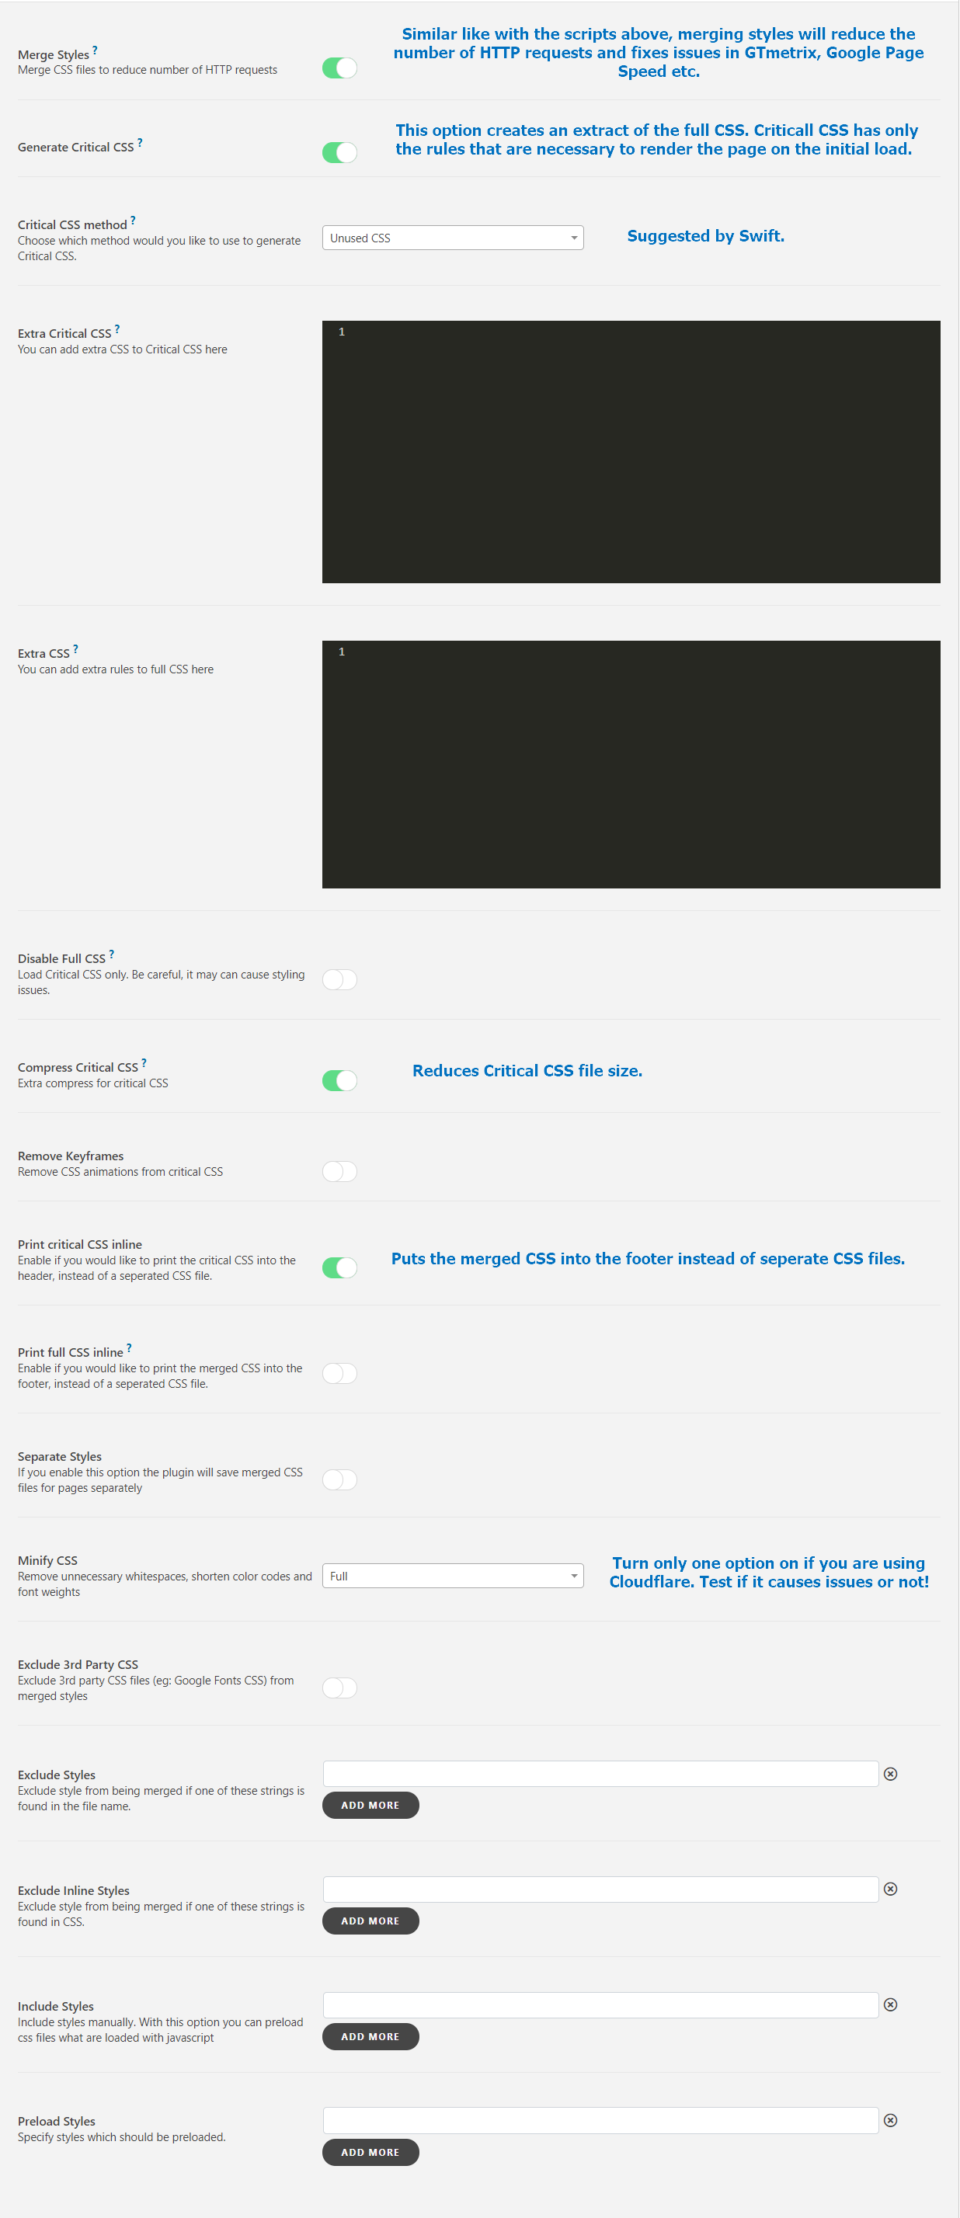
3.3.3. Styles
- Merge Styles – ON
- Generate Critical CSS – ON
- Compress Critical CSS – ON
- Print Critical CSS inline – ON
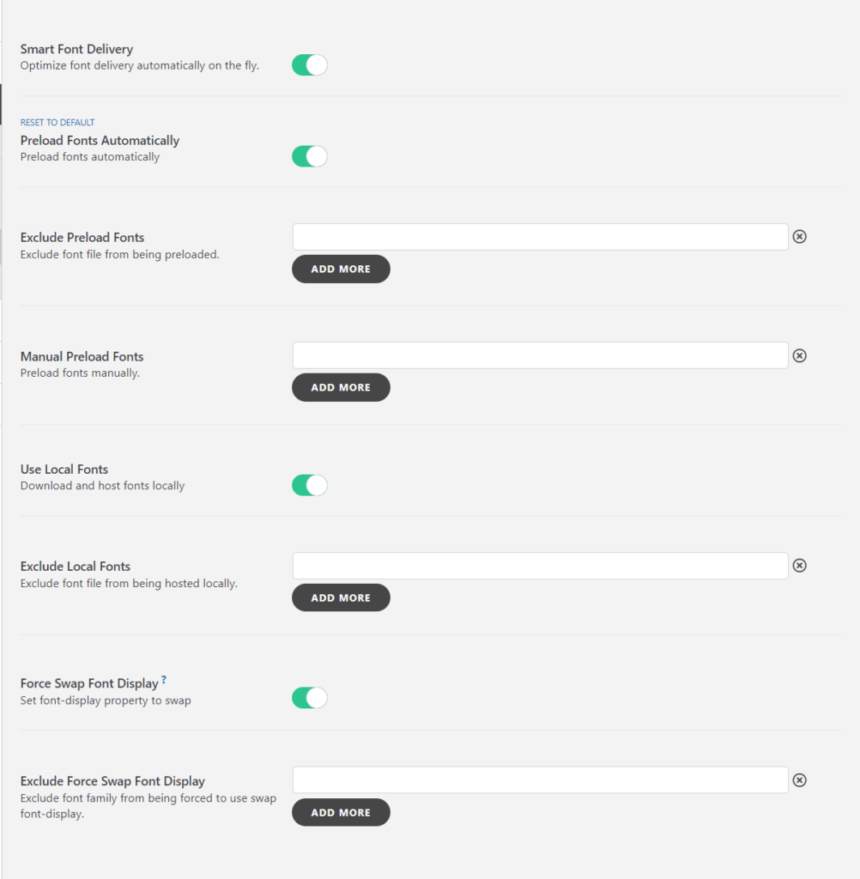
3.3.4. Fonts
- Smart Font Delivery – On
- Preload Fonts Automatically – On
- Use Local Fonts – On
- Force Swap Font Display – On
3.4. Caching
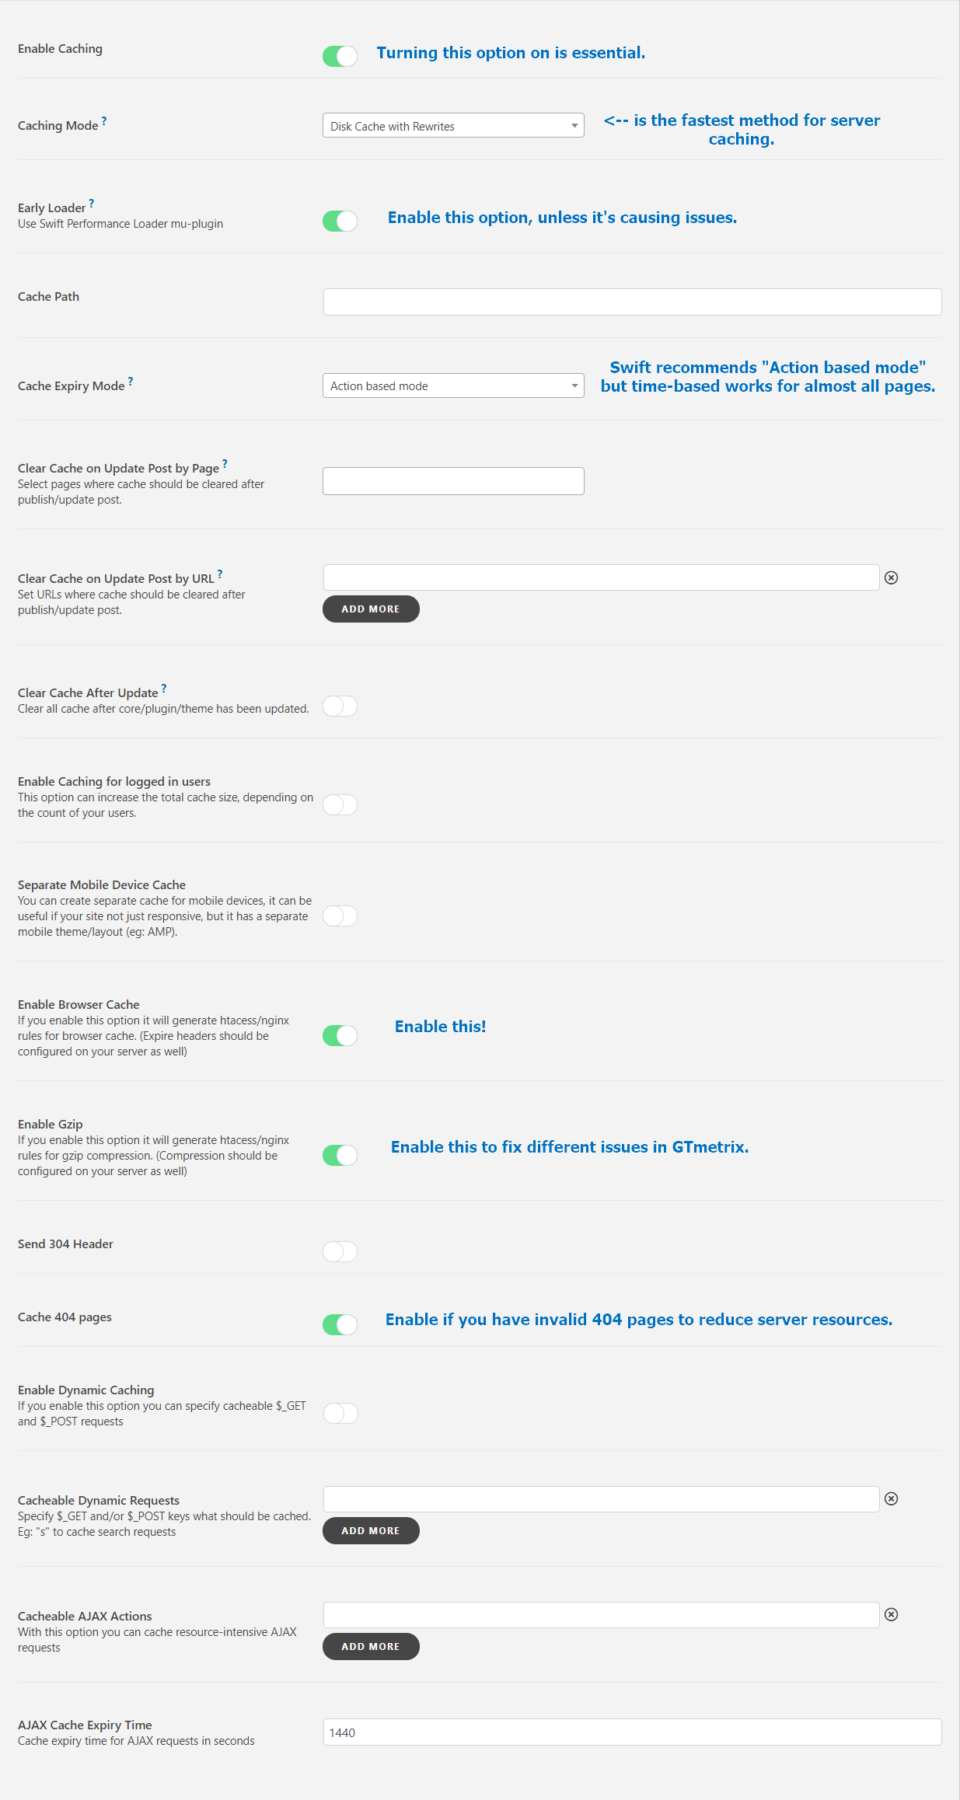
3.4.1. General
- Enable Caching – ON
- Caching Mode – Disk Cache with Rewrites
- Early Loader – ON
- Enable Browser Cache – ON
- Enable GZIP – ON
- Cache 404 Pages – ON
3.4.2. Tweaks

3.4.3. Exceptions

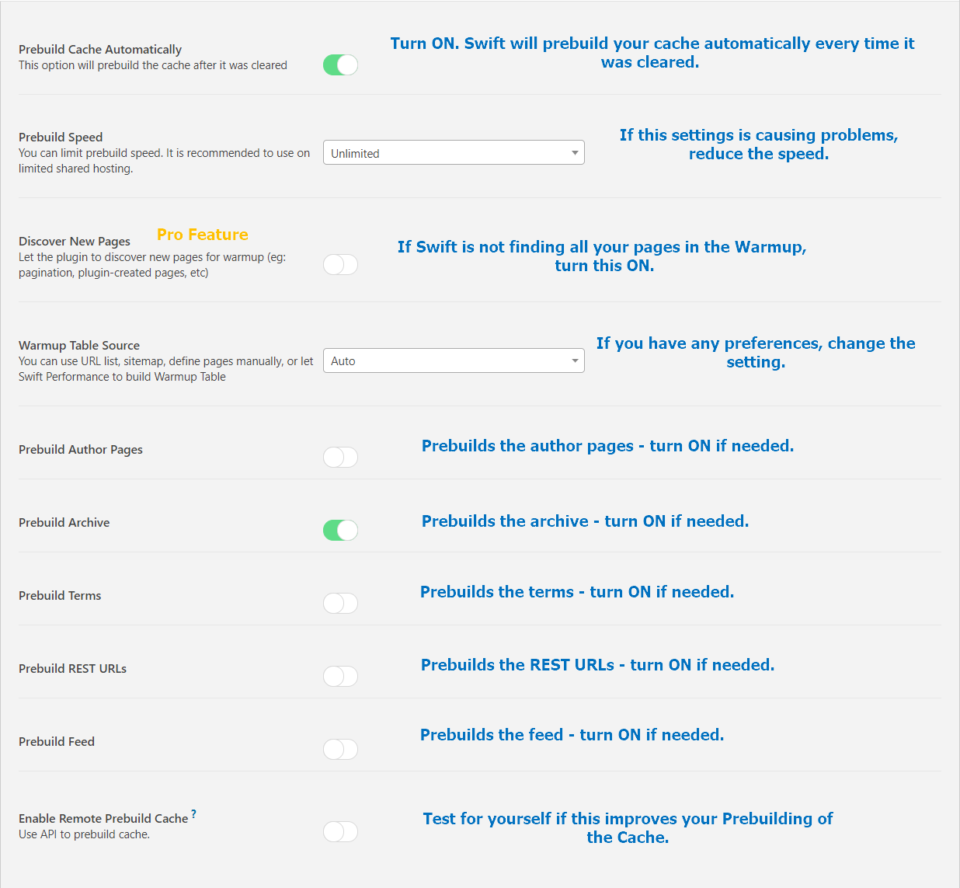
3.4.4. Warmup
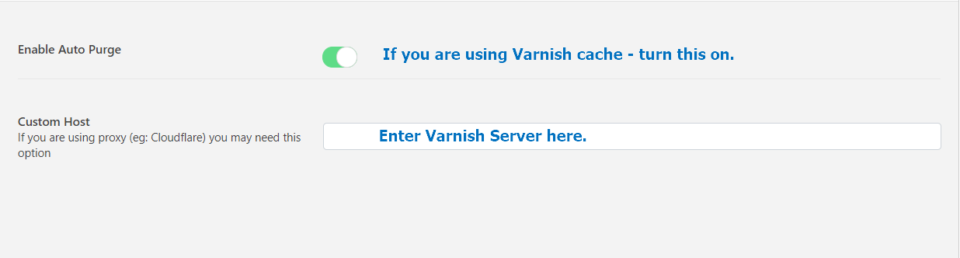
3.4.5. Varnish
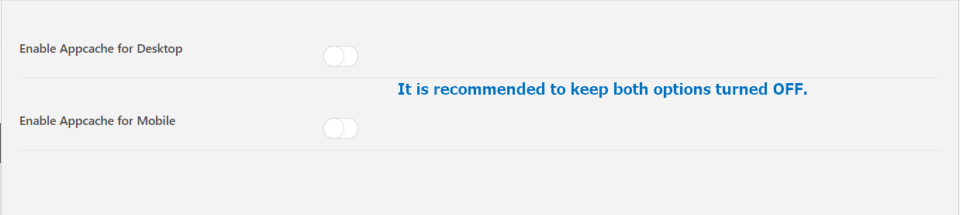
3.4.6. Apache
3.5. Plugins
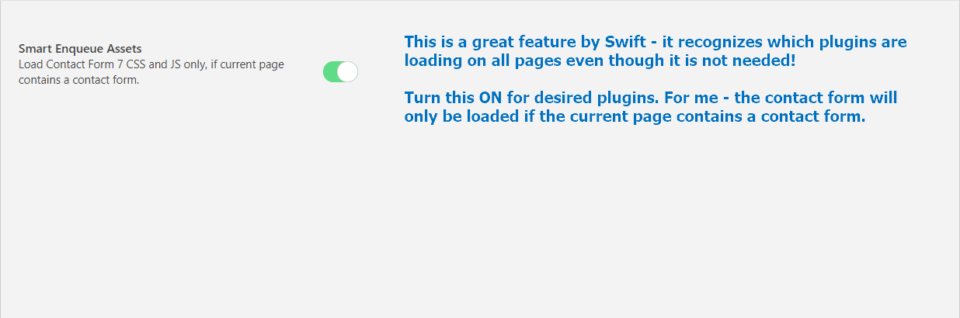
3.5.1. Contact Form 7
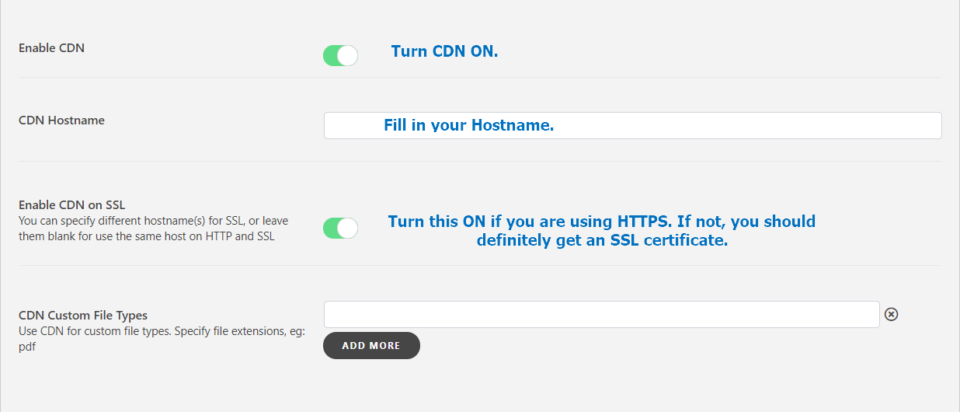
3.6. Content Delivery Network (CDN)
3.6.1. General
If you are using a CDN other than Cloudflare – turn this option ON and fill out the information needed.
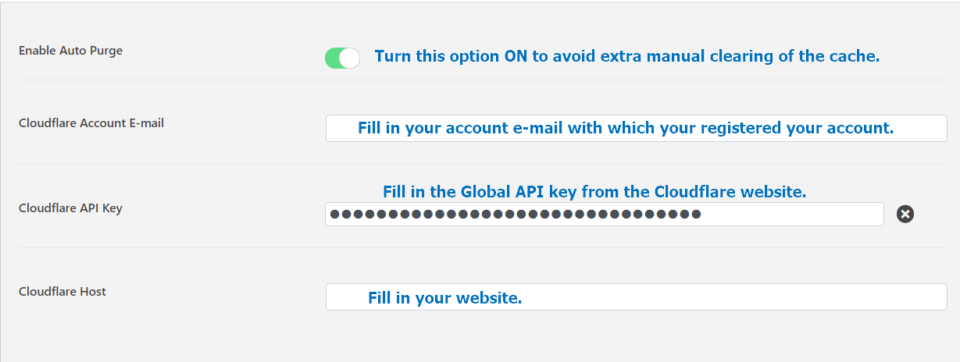
3.6.2. Cloudflare
3.7. Export/Import
Swift Performance allows you to either export your settings or save them.
It will allow you to import those settings and use them for other websites you manage.
4. Image Optimizer (Pro Feature)
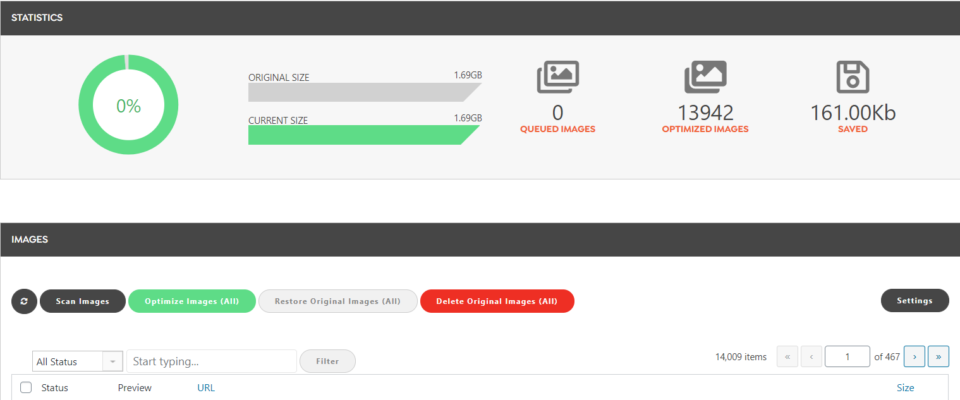
Unlimited Image Optimizer was one of the features that leaned me towards buying Swift Performance. (instead of having multiple plugins, I prefer to have one for all)
As we edited the settings for images before, you can let Swift scan for images & then let it optimize them for you on an unlimited basis.
5. Database Optimizer
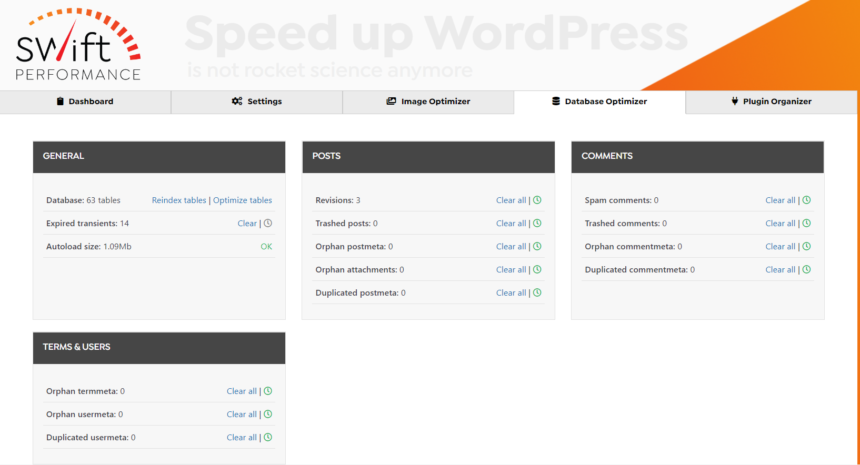
With the help of this feature, you can delete all your spam & trash folders similar to when you delete files on your desktop.
The cleanup includes the deletion of trackbacks, pingbacks, database tables, transients, and post revisions as well as post drafts.
Post revision & drafts are automatically stored by WordPress when you create new blog posts.
All of these files are unnecessary and just slow down your site.
Another useful feature is the possibility of scheduling your clean-up as you can see below.
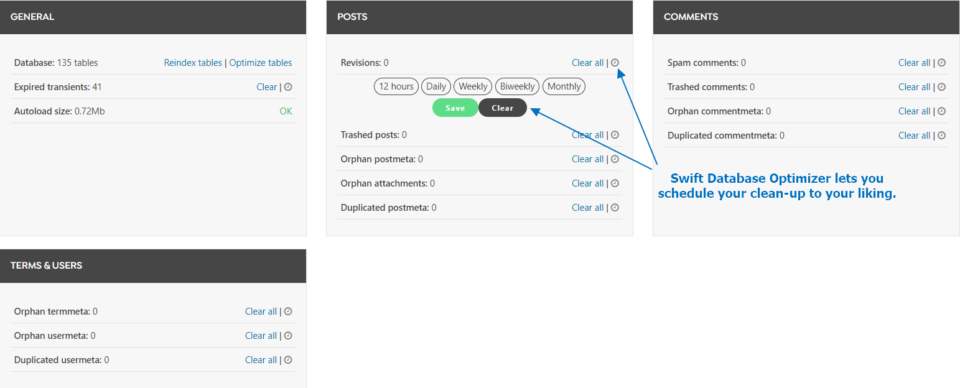
Note
Always take a backup of your site when you are doing the Database cleanup for the first time.
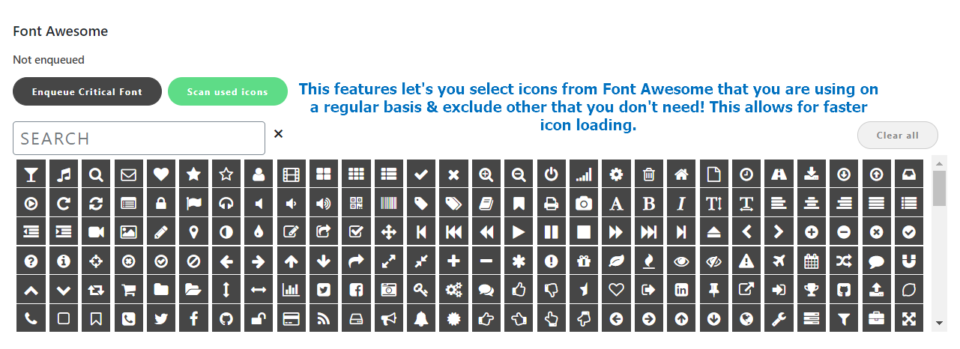
6. Critical Font (Pro Feature)
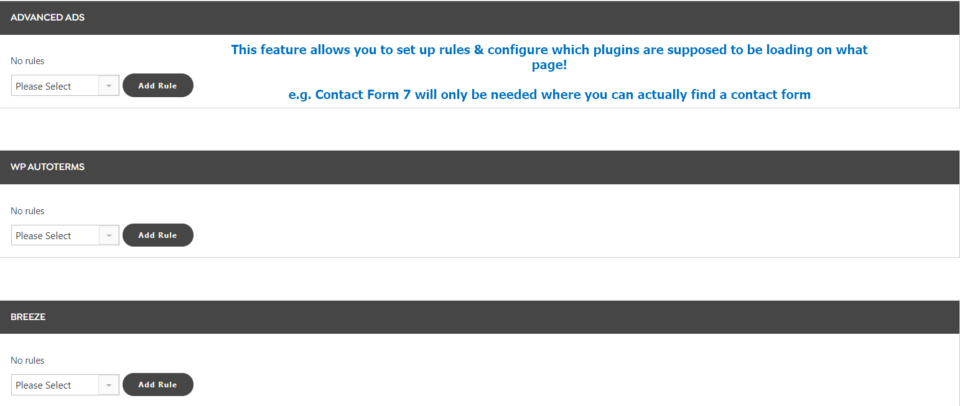
7. Plugin Organizer
Now you are set. One step closer to faster page loading & a better user experience.
Please let me know if those settings worked for you in the comments!
As I mentioned before, Swift Performance is a great all-in-one plugin with robust features that deliver you results.
If you are still unsure about the Swift Performance Pro Version, make sure to test the Swift Performance Lite Version.
If you wonder what other ways there are to optimize your page even further, just take a look at the following guide.
Why did I choose Swift Performance in 2020?
- Besides the fact that Swift Performance in combination with our new hosting provider Cloudways gave me the fastest page speed for the first time, the all-in-one caching tool was exactly what I was looking for.
- Before Swift, it was always a hustle to jump between different “free” plugins of caching & image optimization to achieve nowhere near as good results.
- At the end of the day, you don’t want to spend days trying different combinations of plugins to find minimal improvement for your website.
- Swift Performance to me, is a great all-around plugin that offers you more than just caching:
- One of the best caching plugins on the market including new features & technologies (Preloading of cache etc.)
- Unlimited Image Optimizer
- Database Cleanup including scheduling option
- Allows you to host your Fonts locally
- Plugin Organizer
- 14-day money-back guarantee
Affiliate Disclaimer:
If you are interested in purchasing Swift Performance, we would appreciate it, if you would sign up over our provided link which will enable us to create more beginner-friendly tutorials like these.
Recent Comments